Auth0 Training Labs FAQ
- I’m being prompted to enroll in MFA when I create an Auth0 account
- I signed into the wrong Auth0 tenant
- I can’t connect my Auth0 tenant to the Auth0 Labs extension
- I can’t create a new Auth0 tenant
- I accidentally closed or lost the CodeTour panel
- I can’t scroll down all the way in a CodeTour step
- I’m missing an .env file for my application / My application doesn’t launch
- I’m getting a 503 when I attempt to visit my app
- Codespaces is behaving unexpectedly
- I can’t connect to GitHub Codespaces
- GitHub Codespaces services are blocked on my device / I want to complete the labs locally
I’m being prompted to enroll in MFA when I create an Auth0 account
All Auth0 Administrators are now required to enroll in MFA.
I signed into the wrong Auth0 tenant
You can check which tenant you are signed into at the bottom of the Codespaces window. If you are signed into the wrong tenant, click this area and two options will pop up at the top of the window. Simply select Switch tenant and you can select the correct tenant in the tab that opens.
I can’t connect my Auth0 tenant to the Auth0 Labs extension
The Labs extension currently only works with public cloud Auth0 tenants registered from Auth0.com. Please ensure you have completed your registration process! If you do not, you will not have a tenant associated with your account and you will receive an Activation Denied message when trying to connect to the Labs extension.
I can’t create a new Auth0 tenant
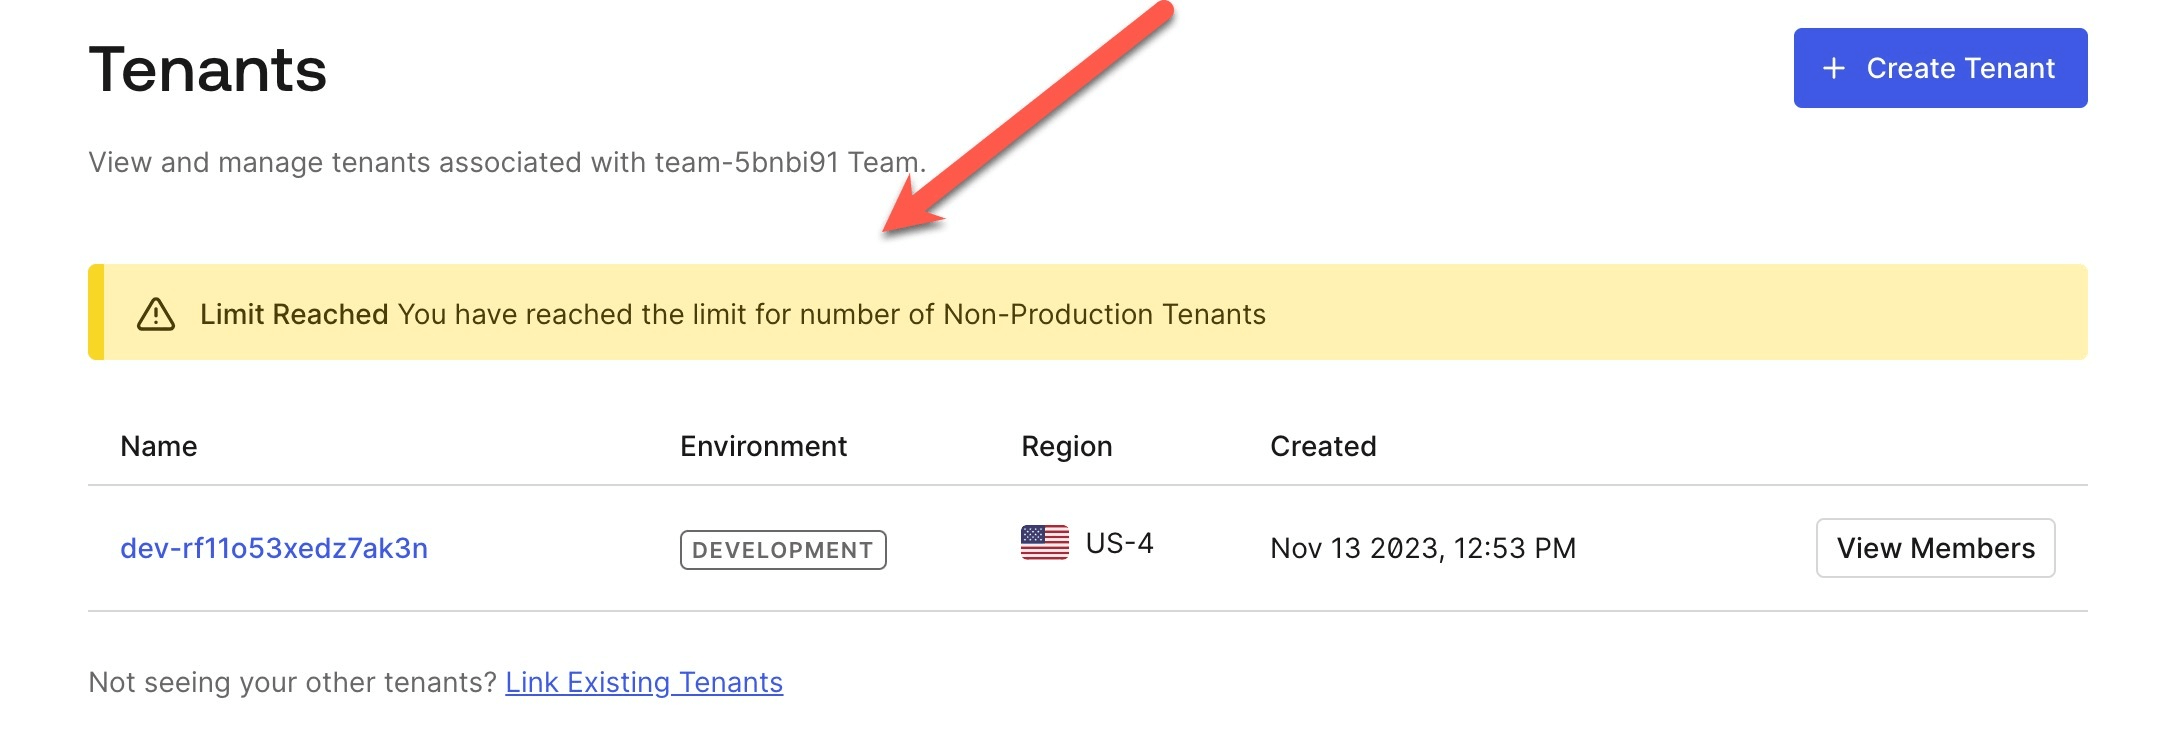
Free tier Auth0 accounts created after October 31, 2023 are now limited to one development/staging environment and one production environment. You can use the default tenant (starts with dev-) for these labs. We always recommend using a fresh development tenant to ensure all configurations are at their defaults. You can register for an additional free tier Auth0 account using a Gmail alias such as username+test@gmail.com (where username@gmail.com is your Gmail address).
I accidentally closed or lost the CodeTour panel
If you’ve accidentally closed or lost the CodeTour panel, you can reopen it. Expand the CodeTour section in the right panel of your Codespace and select the step that you completed. The CodeTour panel will reappear.
I can’t scroll down all the way in a CodeTour step
Sometimes this happens if there is content (such as an image) greater than the height of the CodeTour window. If it’s an image, click on the image and you will be able to continue to scroll. If this does not work, try selecting your CodeTour step in the CodeTour panel as instructed in this section.
I’m missing an .env file for my application / My application doesn’t launch
Sometimes your application won’t launch correctly because you don’t have a configuration set up in a .env file. The .env file is created by the Auth0 Labs extension, but it will only be created if you are logged in to the correct tenant (See: I signed into the wrong tenant) and you have named your application exactly as instructed by the lab.
If you already have a .env correctly configured with the expected values with the correct tenant, you may just need to allow your application more time to launch. You can check the status by going to the Debug Console.
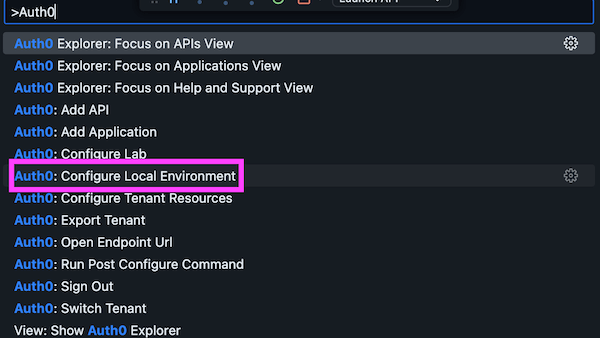
In order to re-run the command that will create the .env file, open VSCode’s Command Palette (CMD+SHIFT+P on Mac or CTRL+SHIFT+P on Windows), type in Auth0, and select Auth0: Configure Local Environment.
You can then check if the .env file was successfully created (in src/web-app for the Web App, src/api for the API, and src/spa-app for the SPA app).
I’m getting a 503 when I attempt to visit my app
This may be due to the Codespaces port-forwarding service being down. You can check GitHub’s Codespace service status here.
You can work around this by opening your Codespace in the VSCode Desktop application (you will need to download VSCode to your local machine if you do not already have it):
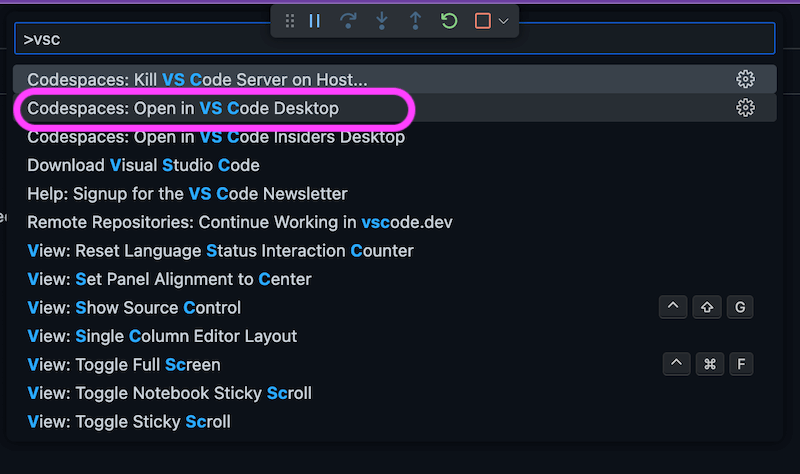
- From your Codespace, open the Command Palette by pressing
CTRL+SHIFT+P(Windows) orCMD+SHIFT+P(Mac) - Type in VSCode and select the following Open in VS Code Desktop:
- This will open VS Code and pop up a message that you can close your browser window.
- If you don’t already have the GitHub Codespaces extension installed, VSCode will prompt you to do so.
- Once your Codespace is open in VSCode, proceed with the lab as normal.
Codespaces is behaving unexpectedly
Every once in a while, a Codespace dev container just doesn’t load correctly. In this case, try reloading the Codespace or even deleting the Codespace and creating a new one. If none of these steps help, check GitHub’s status page.
I can’t connect to GitHub Codespaces
Disconnect from any VPN you may be connected to as it may be blocking certain services Codespaces requires. If this still doesn’t work, see GitHub Codespaces services are blocked on my device / I want to complete the labs locally.
GitHub Codespaces services are blocked on my device / I want to complete the labs locally
If you cannot access Codespaces from your device, you can complete the labs locally after a bit of setup. You can follow these same steps if you just prefer to complete the labs locally.
Setup
- Install Docker Desktop (Okta employees use Self Service / Company Portal).
- Install Visual Studio Code (VSCode) (Okta employees use Self Service / Company Portal).
- Install the Remote Development VSCode extension pack.
Completing the labs locally
- Open Docker Desktop.
- Visit the GitHub repo for the lab you’d like to complete.
Next, you will clone the repo to your local machine and open it in VSCode. If you already know how to do that, please do so now and skip to Step 11.
- Select the <>Code button on the repo page.
- Select the Local tab.
- Select Download ZIP.
- Find the downloaded zip and extract the folder to your preferred directory.
- Open VSCode.
- Go to File > Open Folder.
- Go to and select (do NOT double-click) the lab folder on your local machine.
- Select the Open button.
- Select Reopen in Container in the pop-up.
- You may need to allow Docker access to the folder. Select Allow if this pops up.
- If you’re on a VPN, the correct extensions may not have downloaded to the dev container automatically. Press Command + Shift + X (Mac) or Control + Shift + X to bring up the installed extensions.
- If you do NOT see the following extensions installed in your dev container, install them:
- ESLint (Microsoft)
- EditorConfig for VSCode (EditorConfig)
- Prettier (Prettier)
- ES6 String HTML (hjb2012)
- CodeTour (Jonathan Carter)
- DotENV (Mikestead)
- Auth0 Labs (Auth0)
- Rest Client (Huachao Mao)
- Once these extensions are installed, you should see a CodeTour panel pop up with instructions on how to authorize the Auth0 extension with your Auth0 tenant. Once you’ve done this, follow the rest of the CodeTour steps to complete the lab.